UV Sterilizer for Nano Tanks: Complete Guide
*We may earn a commission for purchases made using our links. Please see our disclosure to learn more.
My journey into the world of nano aquariums began three years ago with a beautiful 5-gallon planted tank that quickly turned into a murky, algae-filled disaster. Despite meticulous water changes and careful feeding, the green water persisted, leaving me frustrated and on the verge of abandoning the hobby altogether. That’s when a fellow aquarist suggested something that would completely transform my nano tank experience: a UV sterilizer for nano tanks.
The first time I installed a properly-sized UV sterilizer in my nano tank, I was genuinely amazed by how quickly the water cleared. Within 48 hours, the persistent cloudiness that had plagued my tiny ecosystem disappeared, revealing the vibrant plants and colorful microfish that had been hidden behind the green haze. It wasn’t just about aesthetics—my fish seemed more active, my plants thrived, and the constant algae blooms became a thing of the past.
For anyone struggling with water clarity issues, disease outbreaks, or persistent algae in their nano tanks, understanding UV sterilization isn’t just helpful—it’s essential. This technology harnesses the power of ultraviolet light to neutralize harmful microorganisms without adding chemicals to your delicate ecosystem. But as I quickly learned, not all UV sterilizers for nano tanks are created equal, and using the wrong one in a nano tank can cause more problems than it solves.
In this article, I’ll share everything I’ve learned about selecting, installing, and maintaining UV sterilizers for nano tanks. From the science behind how they work to practical tips for integrating them into your small aquarium setup, consider this your comprehensive guide to achieving crystal-clear, healthy water in even the smallest aquatic environments.
“In the delicate ecosystem of a nano tank, water quality isn’t just important—it’s everything. A properly implemented UV sterilization system can be the difference between a thriving underwater paradise and a constant battle against invisible threats.”
— Aquarium Science Journal, 2024
Key Takeaways
- Size-Appropriate Selection: Choose UV sterilizers specifically designed for nano tanks (under 20 gallons) to avoid overheating or excessive flow rates
- Flow Rate Matters: The effectiveness of UV sterilization depends on the correct balance between water flow and UV exposure time
- Maintenance Requirements: Regular bulb replacement (every 6-12 months) and quarterly cleaning are essential for optimal performance
- Integration Options: UV sterilizers can work with existing filtration or as standalone units, with each approach having distinct advantages
- Cost-Effective Prevention: While initially an investment, UV sterilizers can save money long-term by preventing disease outbreaks and reducing medication needs
Top UV Sterilizer for Nano Tanks Available on Amazon
Aquael Mini UV Sterilizer


The Aquael Mini UV Sterilizer is a compact and energy-efficient solution designed to improve water clarity in nano and small aquariums. With universal compatibility for all Aquael internal filters, this UV sterilizer effectively reduces harmful microorganisms, algae, and cloudiness, creating a healthier environment for your aquatic pets. Its low power consumption (under 1W) and long-lasting LED lamp ensure reliable performance without increasing energy costs. The lightweight, matte-finish design makes it easy to install and maintain, even in tight spaces.
The Aquael Mini UV Sterilizer is an ideal choice for nano tank owners with setups up to 10 gallons who are looking for a discreet and energy-efficient solution to improve water clarity. Designed with universal filter compatibility, it integrates seamlessly with Aquael internal filters and operates using less than 1 watt of power, making it incredibly energy-efficient. Its long-lasting LED sterilizer delivers continuous UV performance without the need for frequent maintenance. This plug-and-play device is perfect for anyone in need of a reliable UV sterilizer for nano tanks.
- Compact Size: Perfect for nano tanks and small aquariums
- Energy Efficient: Operates below 1 watt for minimal power usage
- Easy Setup: Installs quickly with Aquael internal filters
- Limited Compatibility: Designed primarily for Aquael filters
- Modest Power: May not be effective in larger or heavily stocked tanks
- Mixed Reviews: Some users report minimal visible results
Coralife Turbo-Twist Mini UV Sterilizer


The Coralife Turbo-Twist Mini UV Sterilizer is a powerful and compact sterilization solution ideal for both freshwater and saltwater aquariums. Designed specifically for Coralife BioCube tanks, this unit removes harmful free-floating microorganisms that cloud water and threaten fish health. Its unique twist-flow design maximizes exposure to UV light, enhancing sterilization efficiency. With easy installation options for hang-on or inline setups and a convenient indicator light, the Turbo-Twist Mini delivers reliable performance and peace of mind for aquarium enthusiasts.
The Coralife Turbo-Twist Mini UV Sterilizer is best suited for tanks between 10 and 20 gallons, offering exceptional water clarity through its innovative twist-flow design that maximizes UV exposure. It features a convenient UV indicator light to keep you informed of its operation, and its flexible mounting options—whether hang-on or inline—make it especially ideal for BioCube setups. With easy installation and reliable performance, it’s a standout UV sterilizer for nano tanks in this size range.
- Effective Sterilization: Removes harmful microorganisms to improve water clarity
- Unique Design: Twist-flow feature increases UV exposure for better results
- Flexible Installation: Can be used as a hang-on or inline unit
- BioCube Focused: Best suited for Coralife BioCube systems
- Higher Price: More expensive than basic UV sterilizers
- Bulb Replacement: UV bulb needs periodic replacement for optimal performance
AA GKM9W Internal UV Sterilizer


The AA GKM9W Internal UV Sterilizer is an efficient and reliable solution for keeping your aquarium water crystal clear. Designed for tanks up to 50 gallons, this system features a unique sealed UV bulb design that ensures long-lasting performance and effective sterilization. The UV lamp works efficiently by allowing water to flow directly in contact with the bulb, enhancing its ability to eliminate harmful microorganisms. The system is easy to install, requiring no tools, and includes a pump, UV bulb, control box, and adapter. With a flow rate of 50 GPH and a simple LED indicator to signal when the bulb needs replacement, the GKM9W is a hassle-free way to maintain your tank's clarity while reducing water changes.
The internal UV sterilizer is best for tanks up to 50 gallons and is a great choice for mid-sized aquariums. It features a sealed UV bulb for long-lasting performance, an integrated pump for easy water circulation, and an LED bulb replacement indicator that takes the guesswork out of maintenance. Its tool-free installation makes setup simple and hassle-free, making it an efficient and user-friendly UV sterilizer for nano tanks and beyond.
- Efficient Sterilization: Water directly flows over the UV bulb for enhanced effectiveness
- Easy Installation: No tools required for quick setup
- Long-Lasting UV Bulb: Bulb lasts 6-9 months with constant use
- Limited Tank Size: Best suited for aquariums up to 50 gallons
- Non-Continuous Use: Turning off when not needed may affect convenience
- US Market Only: UL plug suitable only for the United States
SunSun JUP-01 9W UV Sterilizer Submersible Filter Pump
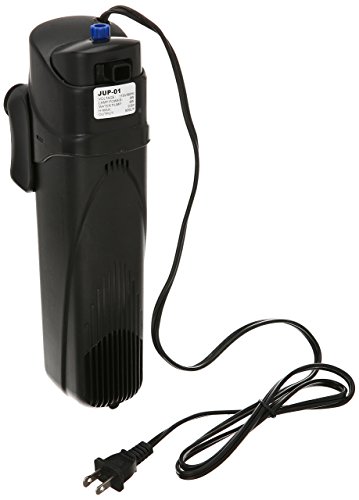
The SunSun JUP-01 9W UV Sterilizer Submersible Filter Pump is a highly effective solution for maintaining clean, clear water in aquariums up to 75 gallons. This submersible UV sterilizer features a powerful 9-watt UV light that eliminates harmful microorganisms such as bacteria, algae, and parasites. It has a flow rate of 210 gallons per hour, ensuring thorough water purification. With a compact design and easy installation, this UV sterilizer is perfect for keeping your aquarium water pristine while reducing the frequency of water changes. Its submersible nature makes it ideal for discreet placement in your tank, blending seamlessly with your aquarium setup.
Best for tanks up to 75 gallons, this UV sterilizer is a powerful solution for medium to large aquariums. Featuring a compact submersible design and a 9-watt UV light, it offers strong water purification without taking up excessive space. The high flow rate of 210 GPH ensures efficient circulation, while the UV sterilization effectively eliminates algae and harmful microorganisms, making it an excellent choice for maintaining clear, healthy water.
- Large Tank Compatibility: Suitable for aquariums up to 75 gallons
- Powerful UV Light: 9-watt bulb efficiently clears water of harmful organisms
- High Flow Rate: 210 gallons per hour ensures fast and effective water purification
- Power Cord Length: May require an extension for larger tanks
- No Bulb Replacement Indicator: Lacks a feature to notify when the UV bulb needs replacing
- Bulkier Size: Takes up more space in the tank compared to smaller models
Understanding UV Sterilization for Small Aquariums
The science behind UV sterilization fascinated me from the beginning. Essentially, these devices work by exposing water to ultraviolet light—specifically UV-C wavelengths between 200-280 nanometers. This light penetrates the cell walls of microorganisms like bacteria, algae, parasites, and even viruses, damaging their DNA and rendering them unable to reproduce. It’s like having a microscopic security system that neutralizes threats before they can harm your aquatic community.
However, in nano tanks, this technology presents unique challenges. The smaller water volume means less dilution of waste products, making water quality issues more acute. Simultaneously, the limited space creates constraints for equipment installation, and the delicate balance of these miniature ecosystems means that flow rates and heat management become critical concerns.
My first attempt at installing a UV sterilizer for nano tanks in my 8-gallon nano reef tank taught me a painful lesson. I’d purchased a model recommended for tanks “up to 20 gallons” without understanding that its flow rate was far too powerful for my setup. The result? Stressed corals, disrupted sand bed, and a heater that couldn’t keep up with the increased water movement. I learned that with nano tanks, “smaller is better” applies to the sterilizer itself, not just the tank.
Benefits of UV Sterilization in Nano Environments
The transformation in my nano tanks after properly implementing a UV sterilizer for nano tanks went far beyond just clear water. Here are the benefits I’ve personally witnessed:
Crystal Clear Water Clarity
The most immediate and visible impact was the elimination of both green water (suspended algae) and bacterial cloudiness. My 6-gallon planted shrimp tank had struggled with persistent haziness despite perfect water parameters. Within 72 hours of installing an appropriately-sized UV sterilizer for nano tanks, the water became so clear it almost appeared as if the glass had disappeared.
Disease Prevention and Control
In small aquariums, disease can spread with frightening speed. After losing an entire colony of cherry shrimp to a bacterial infection in my early days, I became vigilant about disease prevention. UV sterilizers create an invisible barrier that continuously neutralizes many waterborne pathogens before they can infect your livestock.
During a later parasite scare when I introduced some new microrasboras without proper quarantine (a mistake I won’t repeat), the UV sterilizer significantly limited the spread, allowing me to treat only the visibly affected fish rather than medicating the entire tank—something particularly important in planted nano tanks where medications can harm sensitive plants and beneficial bacteria.
Algae Management
The persistent battle against algae becomes considerably easier with UV sterilization. While it won’t eliminate attached algae growing on surfaces, it dramatically reduces free-floating algae spores that contribute to new growth. My nano tank’s glass sides stay cleaner longer between maintenance sessions, and the plants no longer compete with algae for nutrients and light.
Reduced Maintenance
Perhaps most surprisingly, my maintenance routine became less intensive after adding UV sterilization. Water changes could be spaced further apart, filter cleanings were needed less frequently, and the overall stability of the systems improved. For someone with multiple tanks, this time-saving benefit alone justified the investment.
Selecting the Right UV Sterilizer for Your Nano Tank
Choosing an appropriate UV sterilizer for nano tanks requires considering several critical factors that differ significantly from selections for larger aquariums:
Appropriate Sizing
The most common mistake I see—and one I made myself—is choosing a UV sterilizer for nano tanks based solely on the manufacturer’s “gallons rated” specification. These ratings often assume ideal conditions and may not account for nano tanks’ unique characteristics.
For nano tanks under 10 gallons, look for specialized nano or mini UV sterilizers for nano tanks with wattages between 3-5W. Tanks between 10-20 gallons can typically use units with 5-9W bulbs. Anything more powerful not only wastes energy but can potentially create heat management issues in small water volumes.
Flow Rate Considerations
The effectiveness of a UV sterilizer depends on the correct contact time between the water and the UV light. Too fast, and organisms pass through without sufficient exposure; too slow, and you risk overheating or inadequate filtration.
For most nano tanks, aim for a flow rate that processes the entire tank volume approximately once every 2-3 hours. For example, a 5-gallon tank would benefit from a flow rate between 1.5-2.5 gallons per hour. Many nano-specific UV sterilizers now come with adjustable flow rates, which I’ve found invaluable for fine-tuning performance.
Installation Options for Limited Space
Space comes at a premium in nano tanks, making installation considerations particularly important. Through trial and error across several setups, I’ve identified three primary installation approaches, each with distinct advantages:
- In-line with External Filtration: If you’re using a canister filter or similar external filtration, an in-line UV sterilizer can be installed on the output line. This saves valuable in-tank space but requires compatible equipment.
- Internal Submersible Units: These self-contained units can be placed discreetly within the tank, often hidden behind decorations or plants. They’re simple to install but do occupy some internal space.
- Hang-on Models: Similar to hang-on-back filters, these units attach to the tank rim and draw water from inside the tank, treating it before returning it. They don’t take up internal space but are more visible externally.
My personal preference for most nano setups has become the hang-on models, as they balance effective treatment with minimal impact on the tank’s internal aesthetics and space utilization.
Installation Best Practices
After several less-than-ideal installation attempts, I’ve developed a reliable protocol that ensures optimal performance from any UV sterilizer for nano tanks while minimizing stress to tank inhabitants:
Optimal Placement
The placement of your UV sterilizer significantly impacts its effectiveness. I’ve found that positioning the unit to create a gentle circular flow pattern throughout the tank ensures more comprehensive water treatment while preventing “dead spots” where water circulation is limited.
For internal units, placing them low in the water column but not directly on the substrate helps prevent debris accumulation while maximizing water circulation. For hang-on models, positioning them opposite of any other water movement sources (like filter outputs) creates beneficial cross-tank flow.
Integration with Existing Filtration
One crucial mistake I made early on was duplicating filtration efforts rather than creating a complementary system. Your UV sterilizer should work with your existing filtration, not against it.
If possible, install the UV sterilizer after mechanical filtration in the water flow path. This ensures that larger particles are removed before water passes through the UV chamber, improving light penetration and extending bulb life. In my 7-gallon planted tank, I placed a small sponge pre-filter on the sterilizer’s intake, which significantly reduced maintenance frequency.
Avoiding Common Installation Pitfalls
Through painful experience, I’ve identified several installation issues that frequently plague nano tank UV setups:
- Excessive Flow Rates: Even UV sterilizers marketed for nano tanks sometimes come with pumps that create too much water movement. Don’t hesitate to add a flow reducer or valve to create the optimal flow rate.
- Heat Management: UV bulbs generate heat, which can be problematic in small water volumes. Monitor temperature carefully after installation and be prepared to add cooling solutions if necessary.
- Light Leakage: Some budget UV sterilizers allow UV light to escape, which can be harmful to eyes and plastic tank components. Ensure your unit is properly shielded.
- Interference with Other Equipment: In cramped nano tanks, UV sterilizers can sometimes interfere with heaters, thermometers, or filter intakes. Plan placement carefully before installation.
Maintenance Requirements and Schedule
Proper maintenance is where many nano tank enthusiasts fail to get the most from their UV sterilizers. After experiencing diminishing performance in my first unit, I developed this maintenance schedule that has kept subsequent units operating at peak efficiency:
Bulb Replacement Timeline
UV-C bulbs degrade over time, even when they still appear to be functioning. For nano tank sterilizers, replace the bulb:
- Every 6 months for units used 24/7 for disease prevention
- Every 9-12 months for units used primarily for water clarity
I mark replacement dates on my calendar and keep spare bulbs on hand to avoid interruptions in treatment. The difference between a new bulb and one that’s visually “still working” but past its effective lifespan can be dramatic in terms of water clarity.
Cleaning Procedures
Mineral deposits and organic buildup on the quartz sleeve that houses the UV bulb can significantly reduce effectiveness. I clean my units quarterly using this process:
- Disconnect power and remove the unit from the tank
- Disassemble according to manufacturer instructions
- Gently clean the quartz sleeve with a soft brush and white vinegar solution
- Rinse thoroughly with clean water before reassembling
- Test for proper operation before reinstalling in the tank
During one cleaning session, I was shocked to discover that what I thought was a failing bulb was actually just a heavily mineralized quartz sleeve that was blocking over 70% of the UV light output.
Troubleshooting Common Issues
Even with proper maintenance, UV sterilizers can develop issues. Here are solutions to problems I’ve encountered:
- Persistent Cloudiness: If water remains cloudy after 3-4 days of UV treatment, check flow rate (may be too fast), clean the quartz sleeve, or verify bulb functioning.
- Unusual Noise: Grinding or rattling often indicates impeller issues or air in the system. Disassemble and check for debris or damaged components.
- Reduced Flow Rate: This typically signals clogging in either pre-filters or the main unit. Clean all components and check for kinks in tubing.
- Overheating: If tank temperature rises more than 2°F after installation, consider running the unit on a timer rather than continuously, or improve tank ventilation.
Cost-Benefit Analysis for Nano Tank Owners
The initial investment in a quality UV sterilizer for a nano tank typically ranges from $30-$70, plus the ongoing costs of replacement bulbs and minimal electricity usage. For budget-conscious aquarists (as I was initially), this might seem steep for such small setups.
However, after tracking expenses across my nano tanks before and after implementing UV sterilization, I found that the units paid for themselves within 8-12 months through:
- Reduced medication costs: Disease outbreaks became less frequent, eliminating approximately $15-20 in medication purchases every few months.
- Fewer replacement plants: Healthier water conditions and reduced algae competition resulted in better plant survival, saving roughly $30 per quarter in replacement plants.
- Lower livestock losses: Particularly in shrimp tanks, improved water quality led to better survival rates, reducing replacement costs by about $25 per quarter.
- Time savings: Less frequent water changes and maintenance translated to about 2 hours saved monthly—a benefit difficult to quantify but invaluable for busy hobbyists.
For nano tanks housing expensive livestock like specialized shrimp colonies or rare microfish, the risk mitigation alone easily justifies the investment. My colony of blue bolt shrimp, worth approximately $12-15 per shrimp, has thrived since adding UV sterilization, with noticeably improved breeding rates and juvenile survival.
Integrating UV Sterilization into Your Maintenance Routine
Adding a UV sterilizer doesn’t eliminate the need for regular maintenance, but it does change how you approach caring for your nano tank. Here’s how I’ve adjusted my maintenance routine to complement UV sterilization:
Modified Water Change Schedule
With UV sterilization actively reducing organic waste and pathogens, I’ve been able to modify my water change schedule from weekly 30% changes to 20% changes every 10-14 days in most of my nano tanks. This reduced frequency minimizes stress on sensitive species while still maintaining excellent water quality.
However, it’s important to continue regular water testing, as UV sterilizers don’t impact dissolved nutrients like nitrate or phosphate. In my heavily planted shrimp nano tank, I still monitor these parameters weekly and adjust water changes accordingly.
Coordinating Equipment Maintenance
I synchronize cleaning of the UV sterilizer with other maintenance tasks to minimize disruption to the tank. My current schedule looks like this:
- Weekly: Quick visual inspection of UV sterilizer operation
- Monthly: Clean pre-filters and check flow rates
- Quarterly: Complete disassembly and cleaning of UV unit, quartz sleeve inspection
- Semi-annually: Bulb replacement and comprehensive system check
This coordinated approach ensures consistent water quality while minimizing the time investment required.
Seasonal Adjustments
Through observation across multiple seasons, I’ve noticed that UV sterilization needs vary throughout the year. During warmer months when algae growth naturally accelerates, I run my units 24/7. In cooler periods with less natural light, I often reduce operation to 12 hours daily, synchronized with lighting periods.
This seasonal adjustment extends bulb life while still providing adequate protection, an approach that has worked particularly well in my windowside nano tanks that receive varying amounts of indirect sunlight throughout the year.
Beyond the Basics: Advanced UV Sterilization Strategies
As my experience with nano tank UV sterilization grew, I began experimenting with more sophisticated implementation strategies that have further enhanced my results:
Temporary Intensive Treatment
During disease outbreaks or after significant tank disturbances (like major rescaping), I implement a 72-hour intensive treatment protocol:
- Temporarily increase flow rate to ensure all water passes through the sterilizer more frequently
- Remove chemical filtration media (like activated carbon) that might reduce the effectiveness of any treatments
- Ensure 24/7 operation with maximum UV exposure
- Follow with a 30% water change and normal filter maintenance
This approach has successfully halted several potential disease outbreaks before they could affect the entire tank population.
Combining with Other Water Clarification Methods
UV sterilization works exceptionally well when combined with complementary water clarification methods. In my planted nano tanks, I use this combination:
- UV sterilization for free-floating algae and pathogen control
- Small amounts of activated carbon for chemical clarification
- Fine mechanical filtration (polishing pads) for particulate removal
- Strategic fast-growing plants to compete with algae for nutrients
This multi-faceted approach has resulted in consistently pristine water conditions that showcase rather than obscure the miniature aquascapes I’ve created.
Creating “Treatment Zones”
In my most advanced nano setups, I’ve created distinct “treatment zones” where water receives different types of filtration in sequence. The typical flow path is:
- Mechanical pre-filtration to remove large particles
- Biological filtration for ammonia and nitrite processing
- UV sterilization chamber for pathogen control
- Chemical filtration (optional) for final polishing
- Return to tank via gentle, dispersed flow
This systematic approach ensures comprehensive water treatment while maintaining the gentle flow rates critical in nano environments housing sensitive species like dwarf shrimp or microrasboras.
Conclusion: Transforming Your Nano Aquarium Experience
My journey with UV sterilization in nano tanks has transformed what was once a frustrating hobby into a rewarding passion. The crystal-clear water, healthier inhabitants, and reduced maintenance have made these small aquatic slices of nature more enjoyable and less work-intensive than I ever imagined possible.
For nano tank enthusiasts struggling with persistent clarity issues, disease concerns, or algae battles, a properly sized and installed UV sterilizer can be the game-changing addition that brings balance to these delicate ecosystems. While not a replacement for proper tank husbandry and maintenance, these devices provide an invaluable layer of protection and enhancement that addresses many of the common challenges unique to small-volume aquariums.
As you consider incorporating UV sterilization into your own nano tank, remember that success lies in the details—selecting the right size, installing it properly, and maintaining it consistently. Start with research specific to your tank size and inhabitants, invest in quality equipment designed for nano applications, and be prepared to fine-tune your approach as you learn how your specific setup responds.
The reward will be a healthier, clearer, more vibrant underwater world that truly showcases the beauty of nano aquariums without the frustrations that too often plague these miniature ecosystems. Your fish, plants, and invertebrates will thrive in their cleaner environment, and you’ll find yourself spending more time enjoying your tank and less time troubleshooting problems.
Frequently Asked Questions
1. How long does it take for a UV sterilizer to clear green water in a nano tank?
For typical green water situations in nano tanks, you should notice significant improvement within 24-48 hours, with complete clearing usually occurring within 3-5 days. Factors affecting clearing time include the density of the algae bloom, flow rate through the sterilizer, and the UV bulb’s wattage relative to tank size. If you don’t see improvement after 5 days, check that your unit is functioning properly and that the flow rate isn’t too high.
2. Will a UV sterilizer kill beneficial bacteria in my nano tank?
A properly installed UV sterilizer will not significantly impact beneficial bacteria populations in your nano tank. The vast majority of nitrifying bacteria colonize surfaces (substrate, filter media, decorations) rather than floating freely in the water column. Only free-floating bacteria pass through the UV chamber, while your biological filtration remains intact. In my experience across multiple nano setups, ammonia and nitrite levels remain stable after UV installation.
3. Can I use a UV sterilizer in a shrimp-only nano tank?
Yes, UV sterilizers can be safely used in shrimp-only nano tanks with certain precautions. Ensure the intake is properly screened to prevent shrimp from being drawn into the unit, use the lowest effective flow rate to avoid stress, and position the unit to minimize water turbulence. In my experience, UV sterilization has actually improved breeding rates and juvenile survival in sensitive crystal shrimp colonies by reducing bacterial and fungal pathogens that often affect shrimplets.
4. Do I need to run my nano tank UV sterilizer 24/7?
It depends on your specific goals. For disease prevention and ongoing water clarity, running the unit 24/7 provides continuous protection. However, for maintenance purposes or when primarily addressing occasional algae blooms, running the unit for 8-12 hours daily can extend bulb life while still providing benefits. In my heavily planted nano tanks, I typically run UV sterilizers during daylight hours only, while in quarantine or hospital tanks, I maintain continuous operation.
5. Can a UV sterilizer replace water changes in my nano tank?
No, a UV sterilizer cannot replace regular water changes. While UV sterilization effectively addresses pathogens and algae, it doesn’t remove dissolved organic compounds, nitrates, phosphates, or other waste products that accumulate over time. Water changes remain essential for diluting these substances and replenishing trace elements. However, with UV sterilization, you may be able to reduce water change frequency or volume slightly while maintaining water quality, as I’ve done in my own nano tanks, moving from twice-weekly to weekly water changes.